Hair, hair, beautiful hair...
A Friesian painting.
Three years ago I took a photograph of a classic Friesian stallion who has completely captivated me and his image has hounded me ever since. This summer I finally decided to paint him even though he has an extremely long, flowing, wavy mane. Challenging to say the least. So, without farther ado, here is the work in progress (WIP):
Image 1: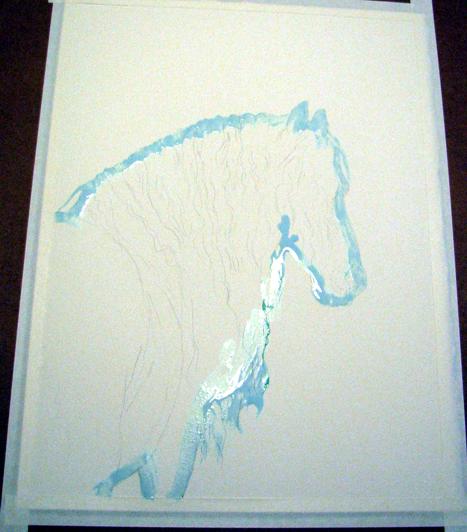 I have started with outlining the horse with liquid frisket so I can do the background without splashing colour on him.
~~~~~~~
Image 2: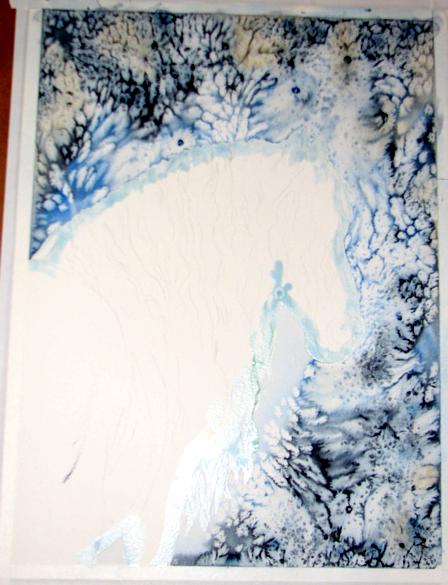 Starting with a background first. Here is what I did: I wet the paper and then applied a very thin wash of light blue to the whole background. As the paper lost some shine, I dropped concentrated paint in Burnt Umber (BU) and Payne's Grey (PG) with a bit of Ultramarine Blue (UB) added I believe. Both of these steps have been done with the help of my kids so it has been a group effort ! I then gave the paint some time to "mingle" and sprinkled with ordinary table salt. Then left it to do it's thing. I was quite surprised by the effect I got but also learned, in playing before doing the actual painting, that different papers will give different effects with the salt. This should be fun to explore...
~~~~~~~
Image 3: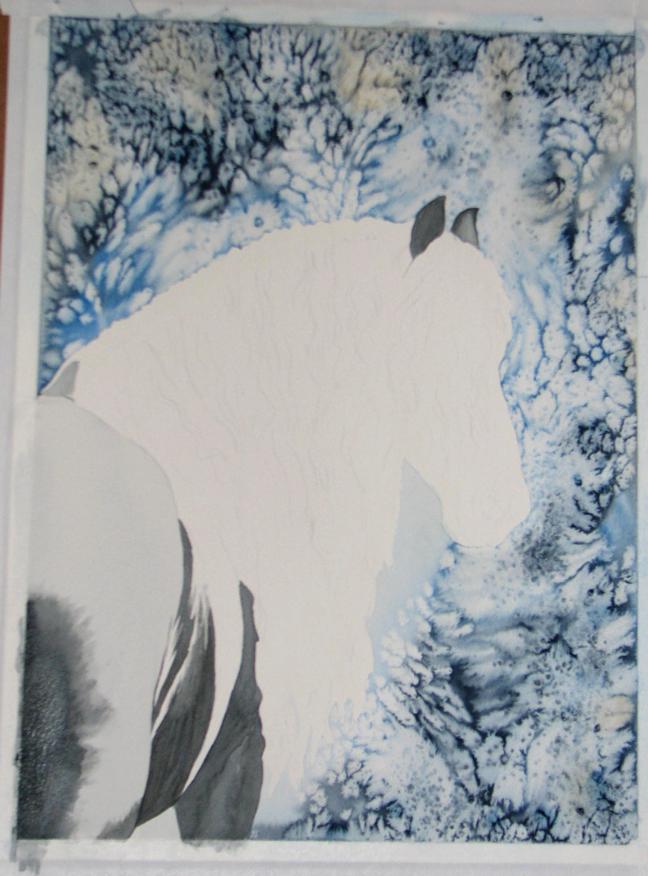 Starting to work on the body. The black I'm using is not truly black straight from the tube but instead a mixture of Burnt Umber (BU), Payne's Grey (PG) and a bit of Ultramarine Blue (UB). I wet the paper with clear water, wait for the shine to start disappearing and then add the colour. It often involves a lot of "pushing" the pigment around the paper, adding more in some places, taking away in others.
~~~~~~~
Image 4 & 5:
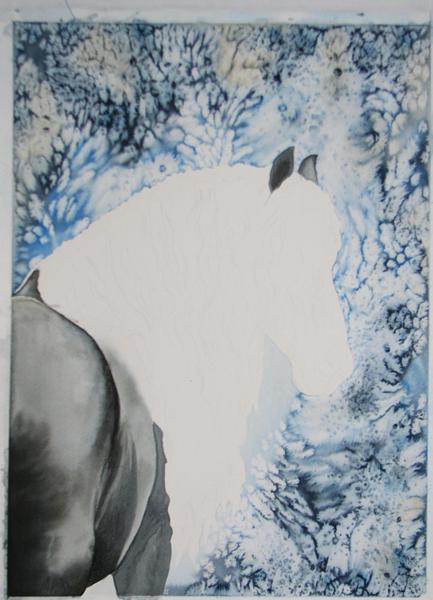 More work done on the bum. There are probably good five or six layers on the hindquarters. Also starting to work on the trunk and the leg.
~~~~~~~
Image 6: The body of the horse is almost finished and I guess it's time to start working on the mane. First of all I wet the whole neck and dropped some colour, BU and UB, separately, into areas on the mane. The reference photo shows me lovely changes of colour and I want to include that in the painting. Whether I'll be successful or not, we'll have to see.
~~~~~~~
Image 7 (a & b):
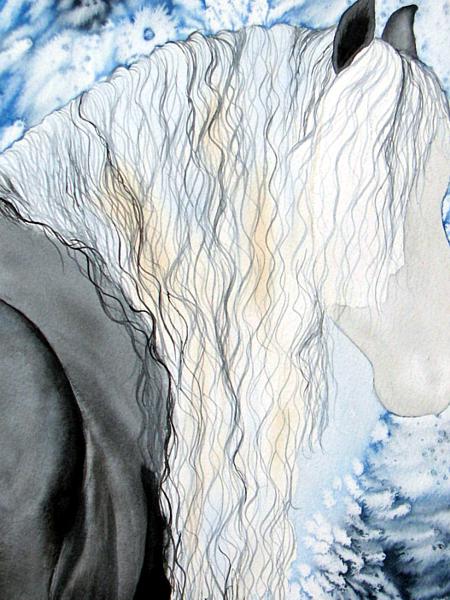 I took a script brush and, with the same mixture I used for the body but diluted a bit with water, started putting in what I call directional hairs. I try to do them random here and after a while, they seem to develop patterns of their own which then helps me to paint the rest using the pattern as a sort of a grid. Most of these "hairs" will not really show up in the final painting, they are just guidelines.
~~~~~~~
Image 8: Here I turned the painting upside down and started painting from the tip to the root, one section at a time. Once I complete this part I will be putting washes of colour to darken the whole mane. I'm not totally happy with it at this point. It looks too even and "arranged", but I think the final washes will help with that as I will be able to sculpt it more.
~~~~~~~
Image 9 (a & b):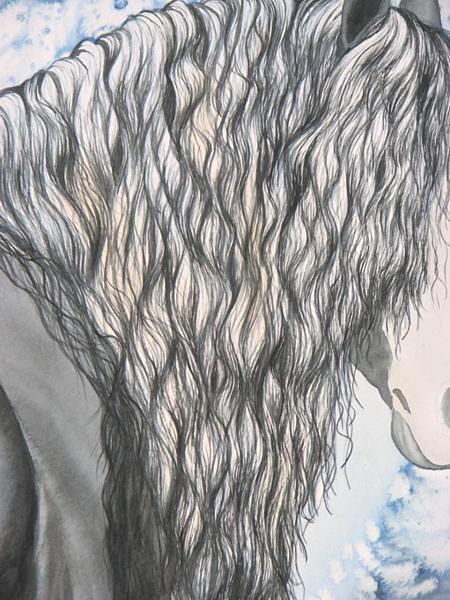
 I have finished painting the base hairs and included a closeup of the brushwork.
~~~~~~~
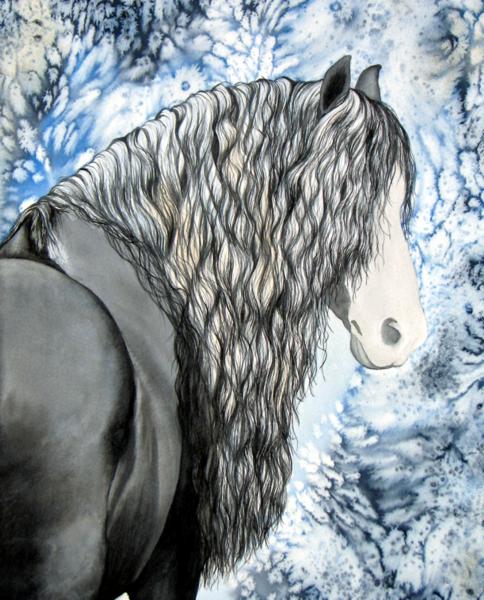
Image 10: In this image I started adding washes of the same mixture I used on the body starting to sculpt the mane a bit more so it doesn't look so flat and "artificial". I will be probably cheating in the end by adding some highlights to the mane with opaque white mixed in. I'm really bad at saving them as I go at this point and I also think i will have a better idea of where they should go for maximum effect once the whole mane is done. That's my story and I'm stickin' to it .
There are at least 3 layers of colour on this already.
~~~~~~~
Image 11: It may not look like I've done much but there are three or four layers added since last update. I have added some BU and UB to the mane again as it disappeared under all the dark layers and kept adding more colour in appropriate places to make the mane a bit more 3D. I've also put two more washes on the head and started modeling it a bit. There is still a lot more to do but I also feel like I can see the light at the end of the tunnel! I love this stage. Just have to be careful not to rush now to see it done. One thing that still frustrates me is that it seems no matter how many layers I put on, it never seems to be dark enough. I was even tempted to pull out the tube of Velvet Black last night and touch up the shadows in the mane, but stopped myself.
~~~~~~~
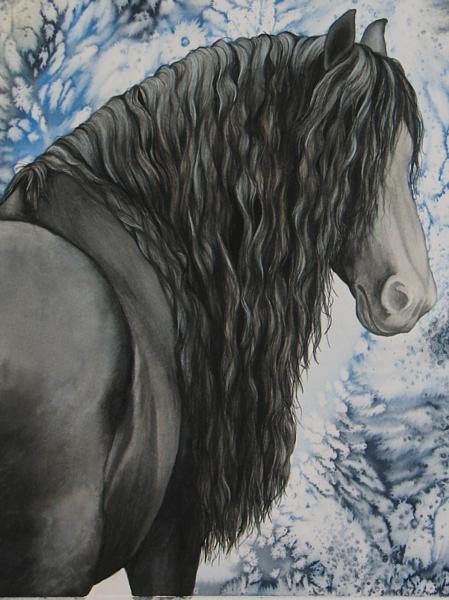
Image 12: I think I can almost call the mane done. Couple more layers in the darkest parts plus a few discrete highlights added with Chinese White seem to have done the trick. Another wash put on face. It's almost there!
Thursday, November 09, 2006
![]()
![]()
Subscribe to:
Post Comments (Atom)


2 comments:
Nice website!
You have beautifull pictures and a nice painting, wauw!
totally amazing to watch this painting transform from plain paper to wonderful finish! absolutely lovely!!!
Post a Comment