Beassell or Rugle?
On the scale of cuteness, this one is about 12.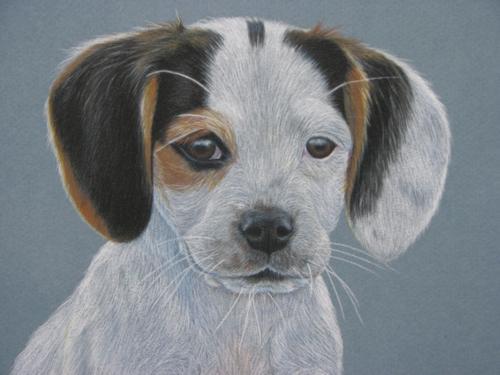 A Jack Russell Terrier / Beagle cross, Cody had enough energy for two puppies when I met him. He provided ample entertainment for a group of parents "watching" the longest t-ball game of the season last August (over two hours) and he was a lot more fun than the game! The photo for this coloured pencil drawing was taken in one of the rare moments when he took a short break to look at his admirers and drink some water.
This was one of the fastest portraits I have ever drawn and I enjoyed it tremendously. Coloured pencils definitely are a very versatile medium and I'm loving them more and more.
If anyone would like to have their puppy, dog or cat immortalized in a portrait such as this, please visit my website for information.
Thursday, December 07, 2006
Wednesday, November 29, 2006
More Misty!
Our whole family is becoming enchanted with our little furball! She is a joy to watch and interact with and gets used to new situations very quickly. We played with her again last night but it was late so we made it short. Wouldn't you know it, she refused to go back to her cage. I guess she wanted to stay out longer. So we obliged her by putting her in her ball and letting her explore the bedroom while my son was getting ready for bed. We also took a few more pictures (though it's hard because she moves so fast!) and a little movie of her washing herself.
I am on a mission to get a picture of her stretching. She looks absolutely adorable when she does that. One hind leg outstretched behind, one fore leg stretched up and out in front, and those scary looking teeth! Here are a few more pictures.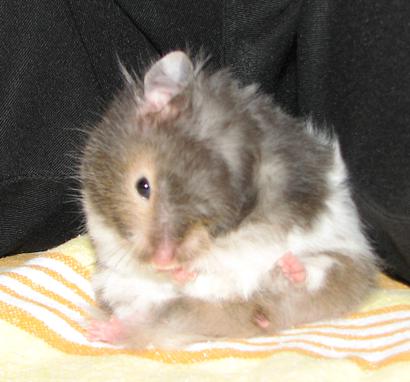 The one-eyed hamster! AKA, Misty washing herself. She's got her ear pulled right down with her "hand".
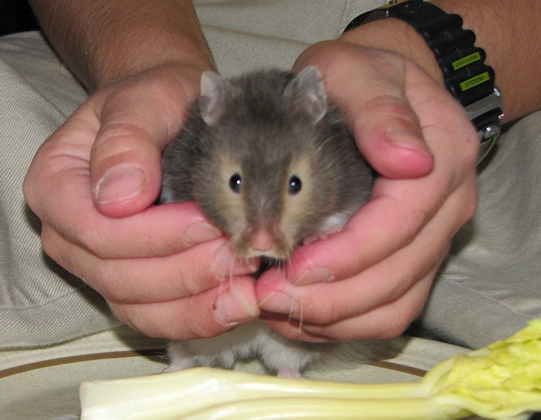 And here she is, cuddled in her "dad's" hand...
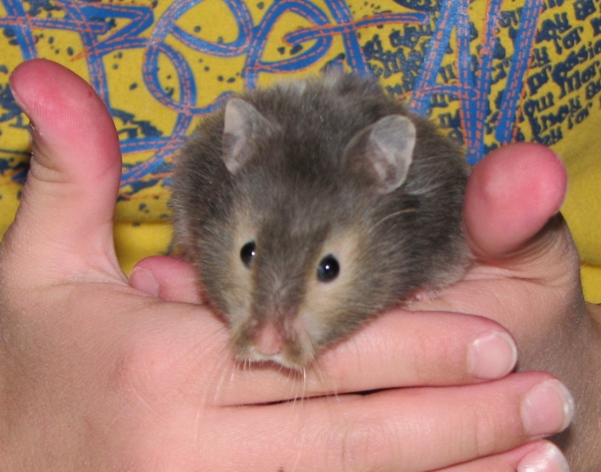 ...and doing the "let's walk the hands" routine.
For a video of Misty washing herself, click here: http://tinyurl.com/yap6yt
Monday, November 27, 2006
Newest fur baby.
Ok, maybe not baby but grandchild. She isn't "mine", she belongs to my 6 yr old son. Her name is Misty and she is a grey and white Teddy Bear hamster. We just got her three weeks ago and we've already had so much fun. My son picked her out of a litter of 6 or 7 hamsters, sleeping in a corner, barely visible. He made a great choice!
She is the cutest hamster I have ever seen, very gentle, personable, inquisitive... Well, she's just a little sweetheart and we all love to play with her. Here she is:

Wednesday, November 15, 2006

Thursday, November 09, 2006
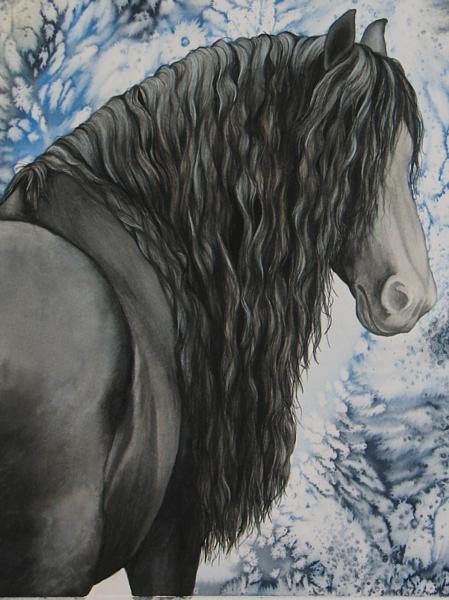
Hair, hair, beautiful hair...
A Friesian painting.
Three years ago I took a photograph of a classic Friesian stallion who has completely captivated me and his image has hounded me ever since. This summer I finally decided to paint him even though he has an extremely long, flowing, wavy mane. Challenging to say the least. So, without farther ado, here is the work in progress (WIP):
Image 1: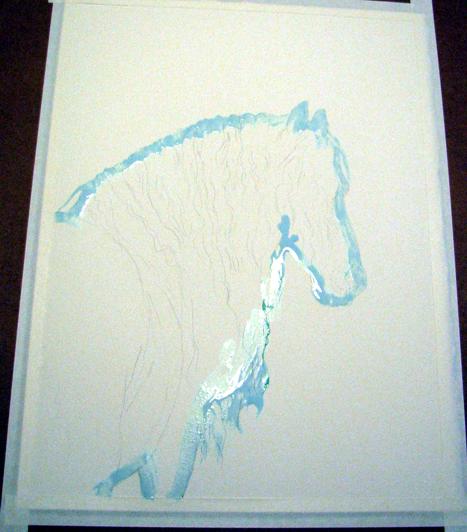 I have started with outlining the horse with liquid frisket so I can do the background without splashing colour on him.
~~~~~~~
Image 2: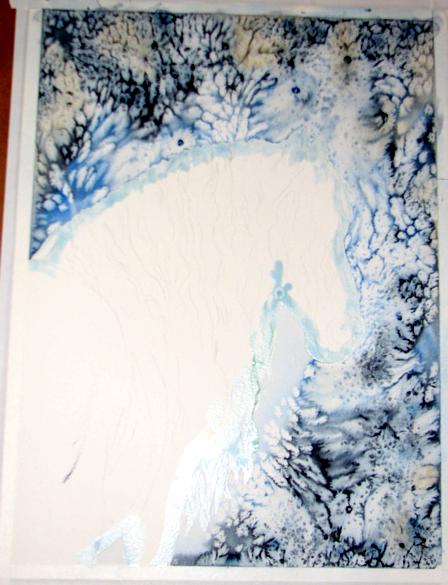 Starting with a background first. Here is what I did: I wet the paper and then applied a very thin wash of light blue to the whole background. As the paper lost some shine, I dropped concentrated paint in Burnt Umber (BU) and Payne's Grey (PG) with a bit of Ultramarine Blue (UB) added I believe. Both of these steps have been done with the help of my kids so it has been a group effort ! I then gave the paint some time to "mingle" and sprinkled with ordinary table salt. Then left it to do it's thing. I was quite surprised by the effect I got but also learned, in playing before doing the actual painting, that different papers will give different effects with the salt. This should be fun to explore...
~~~~~~~
Image 3: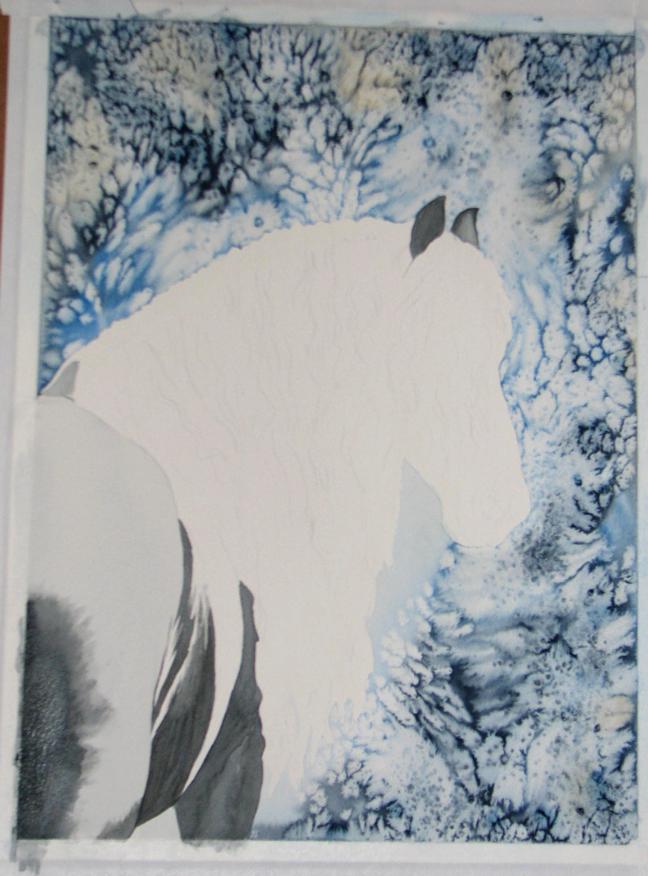 Starting to work on the body. The black I'm using is not truly black straight from the tube but instead a mixture of Burnt Umber (BU), Payne's Grey (PG) and a bit of Ultramarine Blue (UB). I wet the paper with clear water, wait for the shine to start disappearing and then add the colour. It often involves a lot of "pushing" the pigment around the paper, adding more in some places, taking away in others.
~~~~~~~
Image 4 & 5:
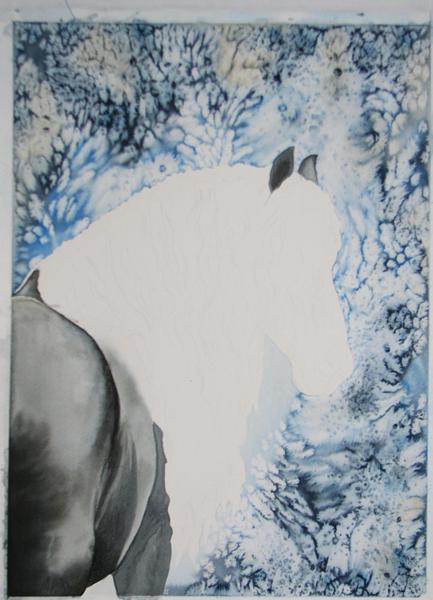 More work done on the bum. There are probably good five or six layers on the hindquarters. Also starting to work on the trunk and the leg.
~~~~~~~
Image 6: The body of the horse is almost finished and I guess it's time to start working on the mane. First of all I wet the whole neck and dropped some colour, BU and UB, separately, into areas on the mane. The reference photo shows me lovely changes of colour and I want to include that in the painting. Whether I'll be successful or not, we'll have to see.
~~~~~~~
Image 7 (a & b):
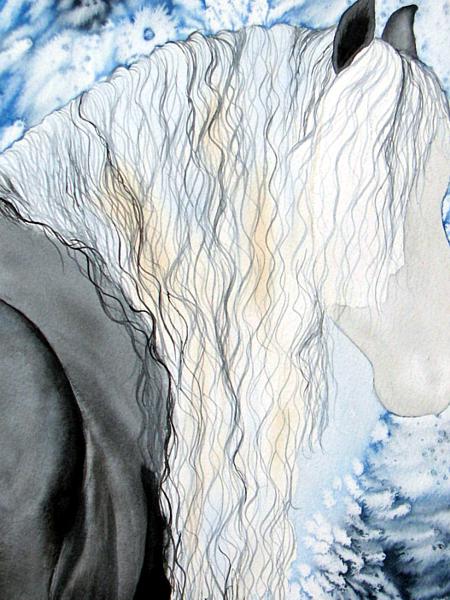 I took a script brush and, with the same mixture I used for the body but diluted a bit with water, started putting in what I call directional hairs. I try to do them random here and after a while, they seem to develop patterns of their own which then helps me to paint the rest using the pattern as a sort of a grid. Most of these "hairs" will not really show up in the final painting, they are just guidelines.
~~~~~~~
Image 8: Here I turned the painting upside down and started painting from the tip to the root, one section at a time. Once I complete this part I will be putting washes of colour to darken the whole mane. I'm not totally happy with it at this point. It looks too even and "arranged", but I think the final washes will help with that as I will be able to sculpt it more.
~~~~~~~
Image 9 (a & b):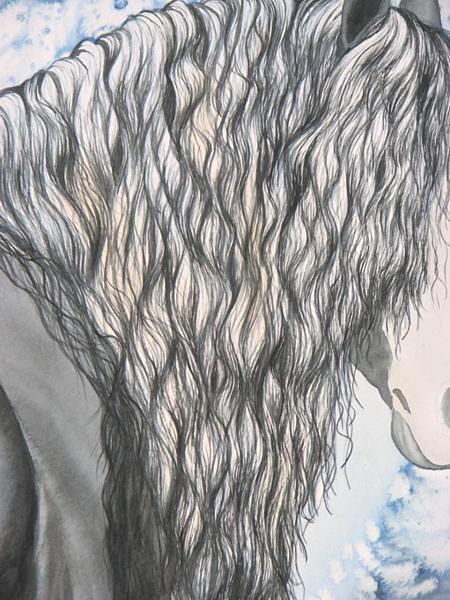
 I have finished painting the base hairs and included a closeup of the brushwork.
~~~~~~~
Image 10: In this image I started adding washes of the same mixture I used on the body starting to sculpt the mane a bit more so it doesn't look so flat and "artificial". I will be probably cheating in the end by adding some highlights to the mane with opaque white mixed in. I'm really bad at saving them as I go at this point and I also think i will have a better idea of where they should go for maximum effect once the whole mane is done. That's my story and I'm stickin' to it .
There are at least 3 layers of colour on this already.
~~~~~~~
Image 11: It may not look like I've done much but there are three or four layers added since last update. I have added some BU and UB to the mane again as it disappeared under all the dark layers and kept adding more colour in appropriate places to make the mane a bit more 3D. I've also put two more washes on the head and started modeling it a bit. There is still a lot more to do but I also feel like I can see the light at the end of the tunnel! I love this stage. Just have to be careful not to rush now to see it done. One thing that still frustrates me is that it seems no matter how many layers I put on, it never seems to be dark enough. I was even tempted to pull out the tube of Velvet Black last night and touch up the shadows in the mane, but stopped myself.
~~~~~~~
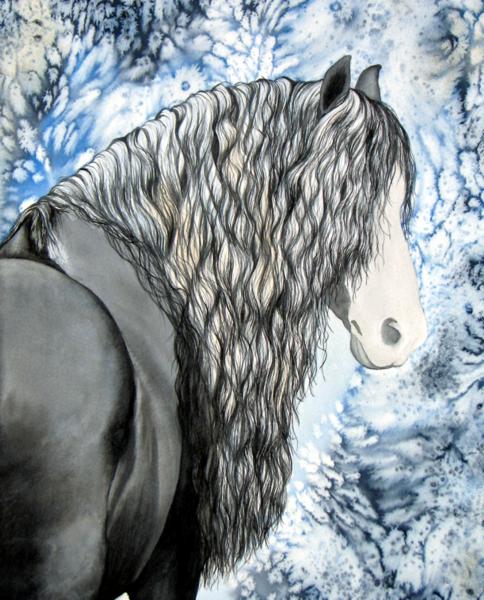
Image 12: I think I can almost call the mane done. Couple more layers in the darkest parts plus a few discrete highlights added with Chinese White seem to have done the trick. Another wash put on face. It's almost there!
Friday, October 20, 2006
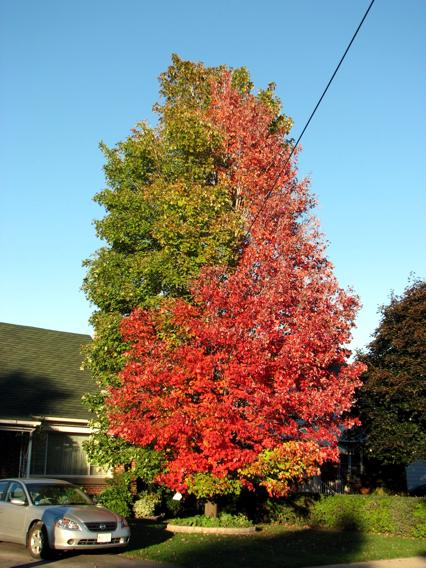 Our Ying-Yang tree.
During the 10 years I have lived at our house our front yard tree has failed to impress me. My husband ensured me it's a "red maple" and *should* have lovely, bright red foliage in the fall. It never delivered. Most of the seasons we may get a few yellowish or brownish leaves stained with a bit of red. Some years we even had a definite reddish hue over the front of it, but it was always somehow flat and mediocre.
I've searched books and internet resources to confirm that it was in fact a red maple and found I could not identify it. I assumed it must be a hybrid and gave up on my expectations of having a striking, flaming-red tree in the front yard.
It was teasing me all these years. In early September first a tiny branch turned brilliant red. Soon many more followed. I dared not hope so I didn't look at it. Didn't want it to know my expectations were growing again. When all other trees in our area were solidly green, our tree was planning a show.
The leaves didn't turn brown and fall as they often did in the past. They remained and in turn infected more of their brothers and sisters with the crimson fever. One day I finally decided it was safe to take a picture of it. Only then did I realize our tree has turned into a Ying Yang symbol.
Tuesday, September 12, 2006
"He wasn't there this morning..." Roadtrips are one of my family's favourite pasttimes and even with the high prices of gasoline, we still indulge every few weeks. My camera is always handy because I KNOW there are real gems to be seen along the road. Last weekend was no different.
On the way back from Wings of Paradise Monarch tagging we drove by a farm tucked away between copses of woods. Had I not looked over and, by habit, checked for equines in the field, I would have missed this little guy. As I busily snapped photos, the farmer came out to look at the little foal hiding behind his mom. I commented on the cuteness factor and he smiled and answered, "He wasn't here this morning..." So, it was a double surprise.
I have very few opportunities to see donkeys not to mention their newborn offspring so it was a wonderful opportunity to gather lots of reference photos as well as just simply enjoy looking at his cute face, long ears and soft body with zebra stripes on his legs, just above the tiny hooves. He will definitely end up as a subject!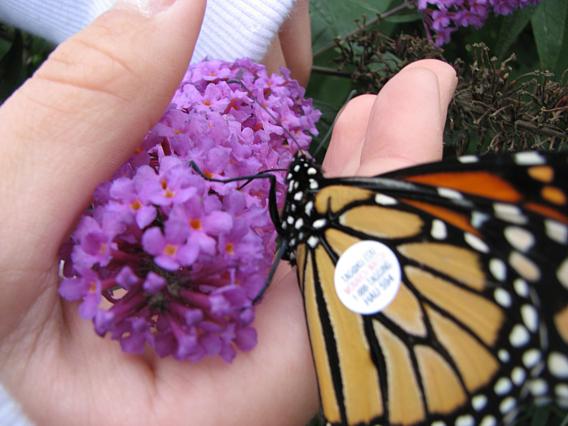
Speaking of butterfly tagging - what an interesting concept. Monarch butterflies migrate to Mexico in the fall arriving around November. It is only their second or third generation offspring that comes back to Ontario in the spring. And how exactly would you "tag" a tiny, delicate butterfly?
We went to see this done to answer that question. it is done with a tiny sticker! The information on the sticker contains a serial number, telephone number, website and e-mail address to contact should someone find the butterfly. After tagging the butterflies are put into tiny triangular boxes in the shape of half a sandwich made of hard paper and kept there until release time. Most of the visitors (all of the kids) got one "butterfly sandwich" and got to release them all at once. It was quite a sight! I did take a picture but it didn't turn out very well. The dark specks you see are the butterflies but there were many more.
There was one more thing we found on that road trip: signs of Fall. It was a chilly day making me think of November but cool days are not unusual in early September. Here and there a tree in full autum splendor popped out and the fields and pastures were full of goldenrod and wild asters. Time to pull heavy sweaters and coats out of storage and stock up on hot chocolate!
Wednesday, July 26, 2006
Tuesday, July 25, 2006
Humbled again!
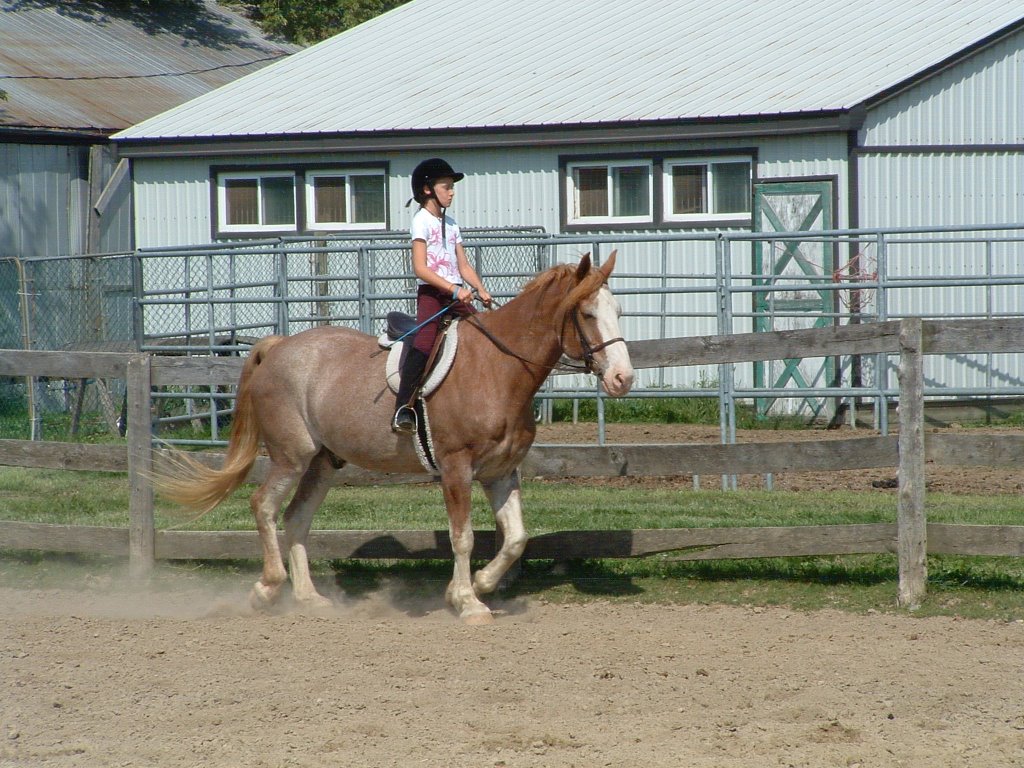
There are times in every rider's life when we think our knowledge is extensive and simply become overconfident. There is nothing like a horse to humble us and return us to reality. For me today was that day.
I have not ridden since June but had a make-up lesson scheduled tonight. Driving to the barn I was not nervous (which is a good thing as I am not a confident rider yet) and even though I wasn't sure how it was going to feel riding again after a month's break, I hopped in the saddle and felt like I've never left. Until I actually started riding...
Yeap, I got humbled all right. Couldn't find my balance in the saddle, kept leaning too far forward, flopped all over in rising trot, could not for the life of me SIT the trot and my toes, when my feet weren't bouncing all over the place, were pointing west and east!... I didn't even attempt canter. And, to add insult to injury (or injury to insult), I badly rubbed... well, let's just say female dressage riders will know exactly what I mean...
I felt like a complete fool and to think that I was actually considering part-boarding a horse. Ha, the likes of me shouldn't be allowed within a mile of non-school horses! I thank God for my coach Allison who patiently guided me to relax, lean back and just LET GO! It must have been painful for her as well.
I know we all have bad rides and they should be appreciated so that we can really see the difference when we have a great one. But really! Days like this make me think I should just stick to drawing horses...
P.S. In the photo is Clyde, my teacher today, with my daughter on board.
Thursday, July 13, 2006
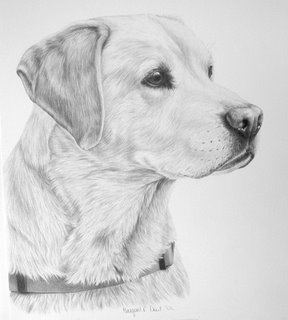
My newest portrait commission is of this lovely, gentle golden lab named Loki. I had the priviledge of meeting Loki in person. I prefer to do it this way if it's possible. I can "read" animal's character quite well from photographs, but nothing really compares to meeting them and being able to touch and interact with them.
Loki is a sweet, gentle guy but don't let his relaxed attitude fool you. He is also very protective of his family and friends. Drawing him was a lot of fun. It would seem that white and black hair is the hardest to render in any media so I spent a lot of time making sure he looked just right! But all the work was worth it. I am very proud of this one!
Friday, June 23, 2006
All done!
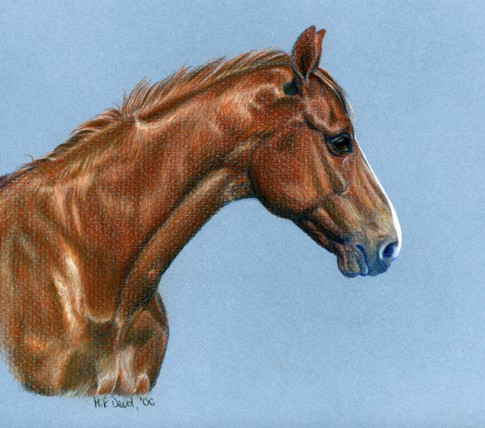
And here he is: Cratic, a Dutch Warmblood gelding, my old bud. It's always fun to draw your friends, be they human or animal, but there is always that fear that we won't get that special look and character. We are so acustomed to looking at them we often don't truly see the features that are there and instead let our brain take over and "tell" us what it *thinks* is there.
It looks like I didn't need to worry about it this time. Cratic looks very much like his old self - a sweet, gentle soul with a touch of timidity in his eyes. He is 22 years old this year and I do hope he is enjoying a great retirement.
Tuesday, April 11, 2006
Things are going pretty well inspite of paper problems. This Canson MiTientes may be a great paper, but I'm using the wrong side. Or the right one... In other words, the side you are supposed to use (textured) is too darn textured for my liking and creates a lattice-like effect in the drawing that I definitely do NOT like! It's impossible to fill in all the little holes unless I want to sit and fill each one at a time while sharpening the pencil every 5 seconds. Nope. Luckily this is only a practice piece so it doesn't really matter, but I have definitely learned my lesson. Next time I'll use the smooth side!
Here is Cratic as he looks now.

IT'S TIME TO ADD SOME COLOUR!
Once the underpainting is done it's time to start adding real colour. This is the scary stage. The monochromatic drawing looks so good, I'm worried it will get screwed up. But here goes.
Most of the time I use Terra Cotta with some Dark Brown and Cream for hightlights occassionally adding some white to the brightest highlights. Once I put down a good layer, I blend it with a colorless blender and add more layers.
Thursday, March 30, 2006
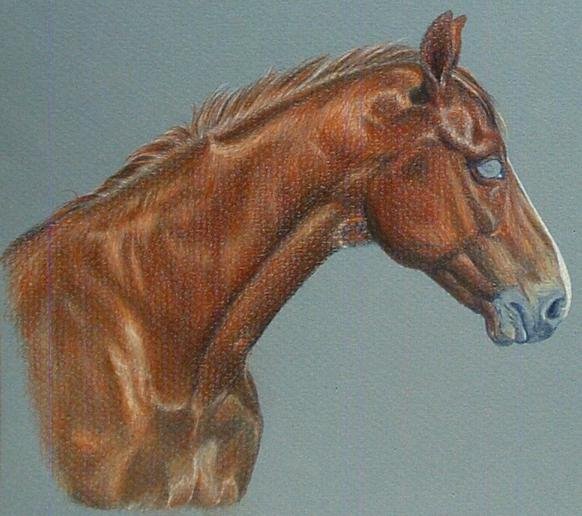
Colour my world!
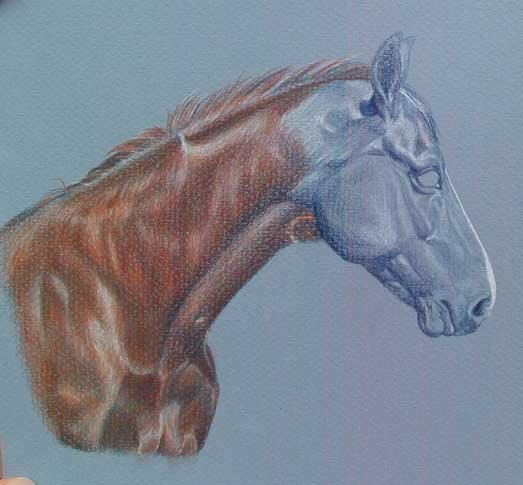
New Projects!: I am currenlty working on a graphite portrait of a golden lab and in the middle of this portrait I realized I needed some colour in my life. So I started working on another piece simultaneously. It's a little practice portrait in colored pencils of an old friend Cratic - a very talented and beautiful Dutch Warmblood gelding, retired from competetive Dressage now, whom I used to work with many years ago. This will be a WIP (Work in Progress) type of post, so check back and see how Cratic goes.
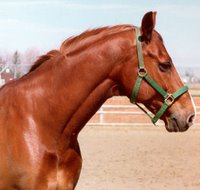
Here is the reference photo of Cratic and two updates to the drawing. Prismacolor pencils on Canson MiTientes paper, textured side.
~ * ~
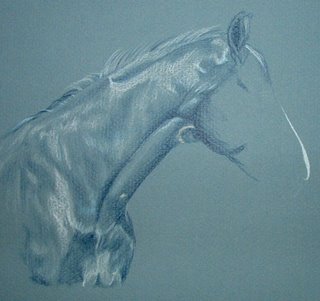
Starting the underpainting layer with only two pencils: Indigo Blue and White.
~ * ~
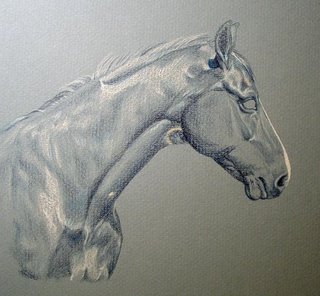
Most of the face has been blocked in, but, as you can see in the photo, he has a halter on and it is throwing strange shadows on his face so I had to stop and look for some "naked" pictures of Cratic to figure out how the side of his face is structured. Come back for an update!


